Making IDC & MTA tooling, part 2
As usual, click on an image for the larger size.
Start:
I didn't have enough pieces in my scrap collection that were of the correct thicknesses, so I went to the hardware store. Most hardware stores - REAL hardware stores, not Home Despot or Lowes - have little racks containing small cuts of aluminum, brass, and stainless steel, usually in different thicknesses, widths, and stock (flat, round, tube, sheet, angle, channel, etc.).
The 0.156" IDC need blade widths of 0.60" spaced (obviously) 0.156" apart. Standard sheet/plate thicknesses include 0.63" and 0.93" which are perfect for this application. If the blades are 63mil, then 156mil-63mil=93mil between blades. Sweet.
I went with brass since it is easier to machine than steel and will last much longer than aluminum, and brass is usually available in the largest variety of sizes & shapes.
Here is a lousy shot of the base stock: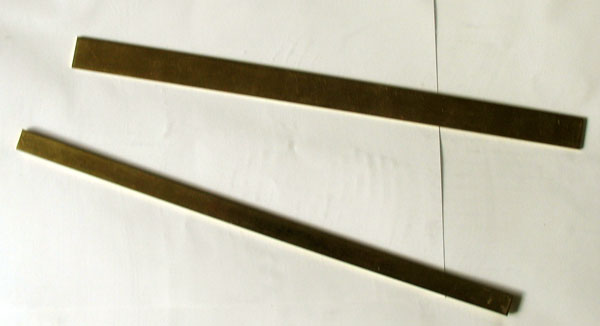
Next was to cut the pieces: four blades, 3 spacers.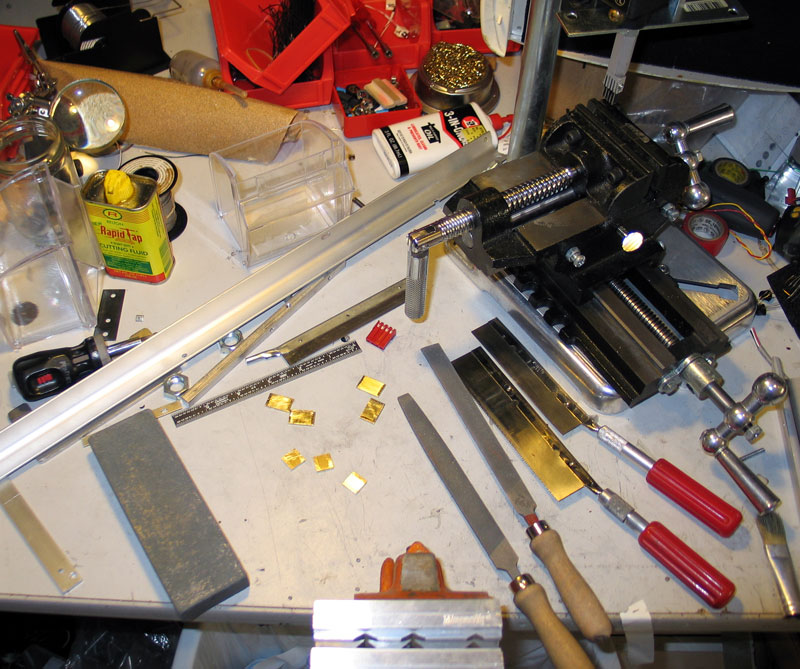
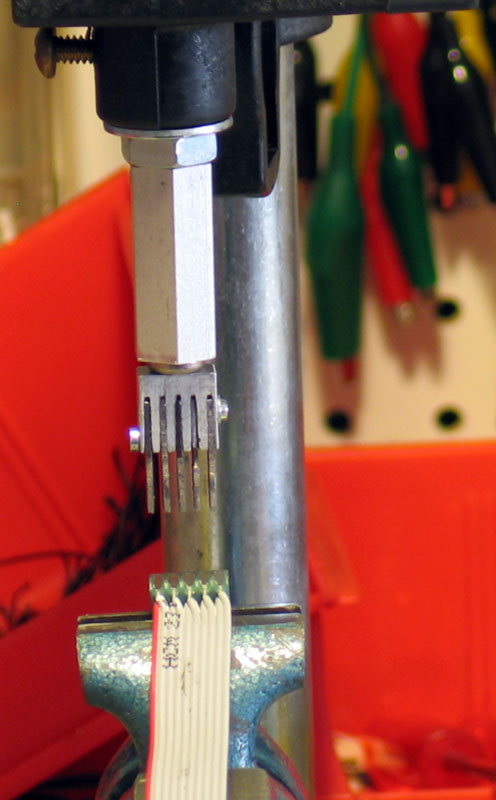
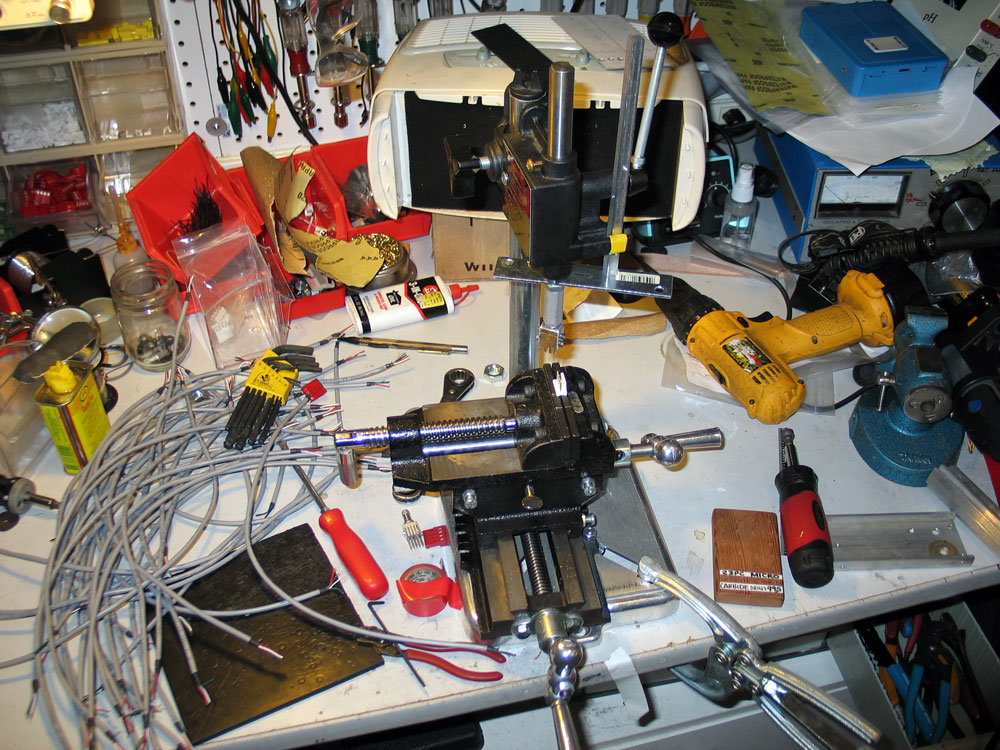
I left more of the bench in this shot to show the tools I was using and the final version of the 0.100" MTA press setup. Oh yeah: the "press" I'm using is an adapted Dremel model 212 (older style) drill press. I'll cover the Dremel press later.
As you can see, I'm mostly using basic hand tools for all this. The razor saws are wonderful little toys - they can cut wood, plastic, and non-ferrous metal, even some softer ferrous metals - and are very thin. Most common hacksaw blades have teeth that are "wavy set", if you look at the teeth they are tilted away from the centerline of the blade by varying amounts in the form of a wave running along the saw edge. This is to allow chips of material to be moved away from the area of cut so the next tooth makes contact with the uncut material. That's nice when you are just cutting pieces to size, but it increases the width of the cut. The razor saws are usually straight-set, so the width of the blade is the width of the cut, and they produce the finest cuts you can get with simple hand tools.
The rest are pretty straightforward - small files for shaping, a vise for holding, and a stone for smoothing & truing-up uneven surfaces. Later you will see some needle files that are used for more precise shaping.
Here are the pieces assembled & clamped for drilling: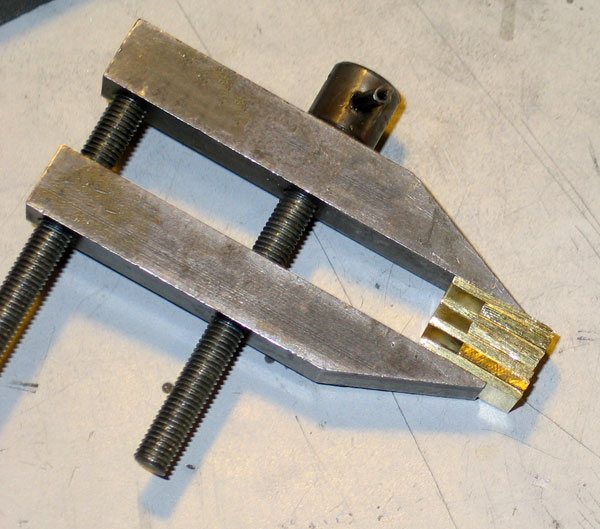
I forgot to take pictures until I had already drilled the second hole, but the next steps:
Put the clamp in the vise. Use a center punch to mark where the hole will be & to guide the drill. Drill the hole.
Since the pieces are so small, I had to insert a screw in the first hole (with a lockwasher and nut on the other side) to hold the piece together. Then I could remove the clamp and hold the piece in the vise directly and drill the second hole.
The second hole with associated screw started, as well as a view of the mess that is my workbench: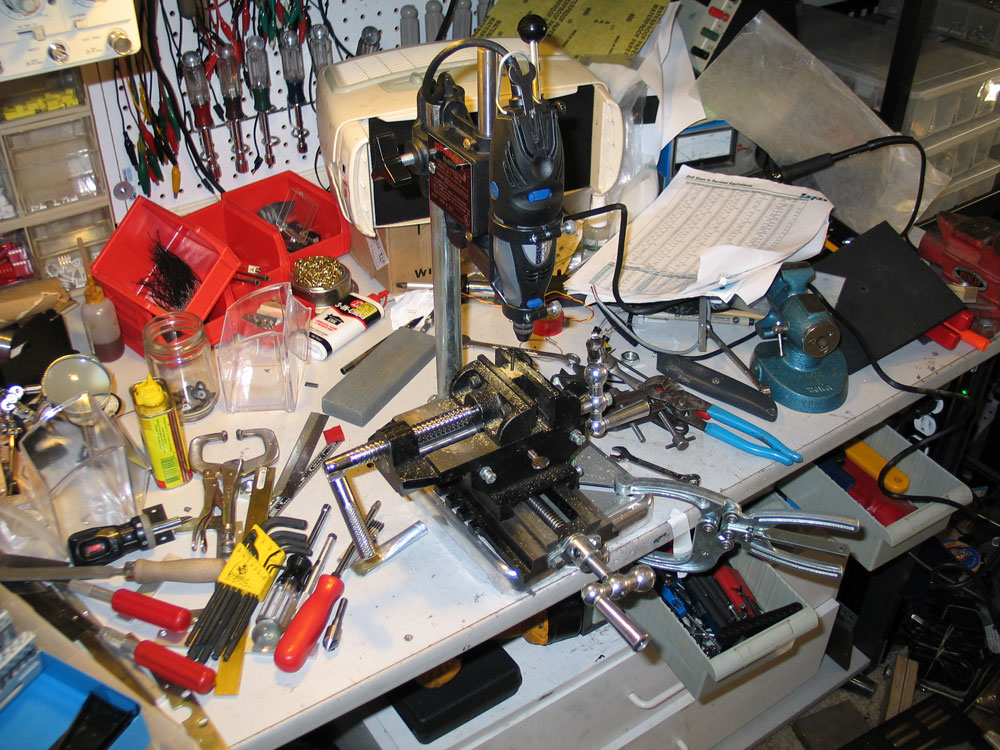
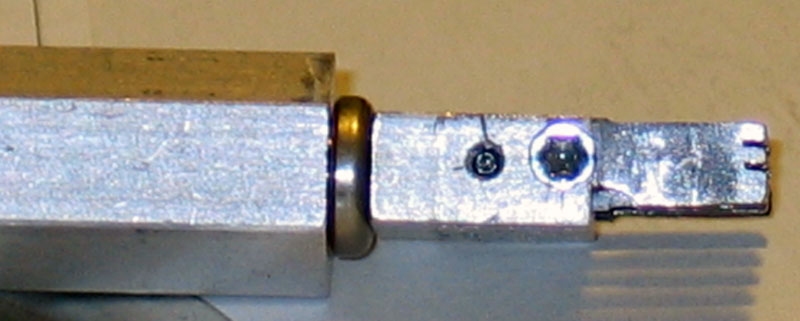
A closer view of the piece: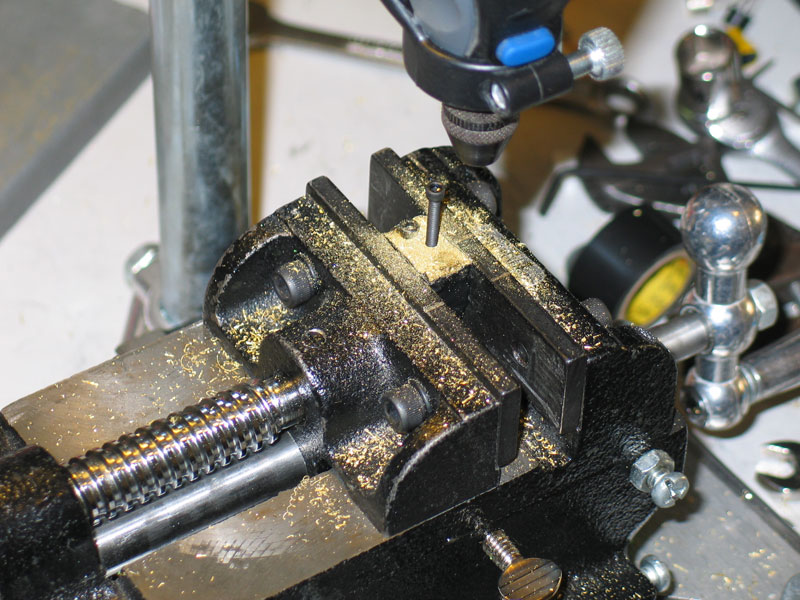
The edges of the piece are uneven at this stage, so I wrapped the piece in electrical tape to give the vise a better grip - steel does not conform well to uneven surfaces.
The next step was to cut the slots that will allow clearance for the connector terminals. I missed a few pictures again, but here's what happened in the interim:
Take a connector and cut away any obstructing pieces of plastic.
Using a permanent marker, paint the surfaces that will be cut.
Place the connector on the piece and smack it with a mallet or other object. (Interesting trivia - the difference between a hammer and a mallet: A hammer is harder than what you hit with it, while a mallet is softer than what you hit with it.) This will scrape away the ink where you need to cut, leaving shiny guide marks.
Cut the slots.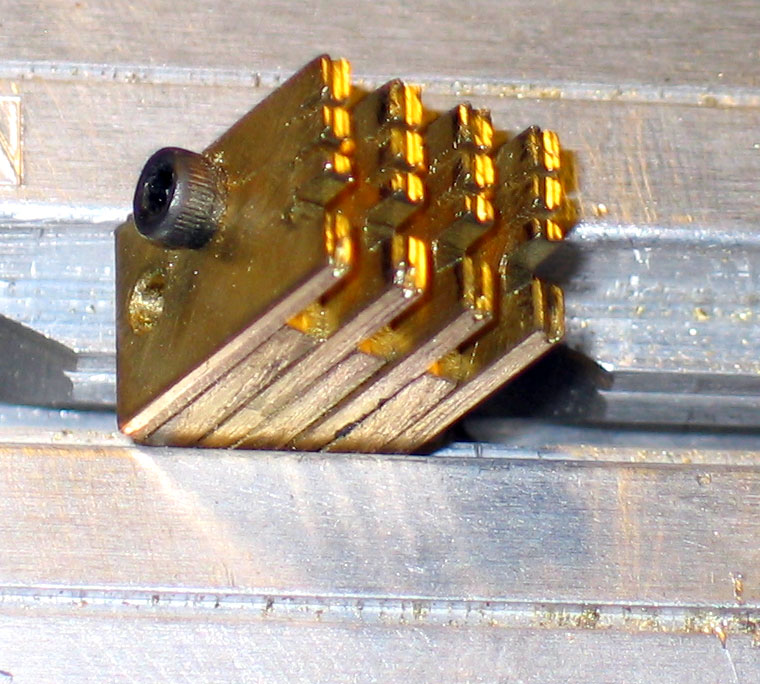
I didn't want to trim the blades narrower, so I had to cut a wide groove to allow clearance for the thick plastic wall that clamps the insulation where the wires enter the connector.
You can see the grooves that run the length of each blade. These grooves keep the wire from slipping to the side as you press them in - which usually results in a mangled or severed wire. I did this on the 0.100" die head too.
These grooves are kind of tricky - you are trying to make a cut in a piece that is onle 63mils wide after all - so require some patience. All saws and files will try to wander a bit if you do not have a guiding groove or cut and, on a piece this small, that can be disastrous. Use an X-acto or other sharp knife to make a guide cut on the end corner of the piece (another reason to use brass), then take your file or saw and slowly enlarge the groove a little until it is enough to hold the saw/file without wandering. Then, carefully, extend the groove across the face of the die blade.
Now for the needle files: Once you have a cut of sufficient depth across the die blade, use a triangular needle file to widen the cut out towards the edges of the die blade. Next, use a file that has a narrow, rounded edge to turn the triangular groove into a rounded groove.
Finally, check the fit of the die head into the connector and then clean up the edges so there are no burrs or sharp corners.
Once again, I skipped a few photo ops - making the piece to hold the die head. I located a piece in my junk pile that was u-shaped and fit closely around the die head, drilled holes to match the two screw holes in the die and one for the press bolt, and trimmed it to size.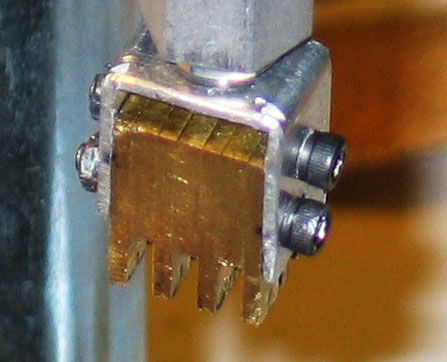
Here's the final setup & another bench shot: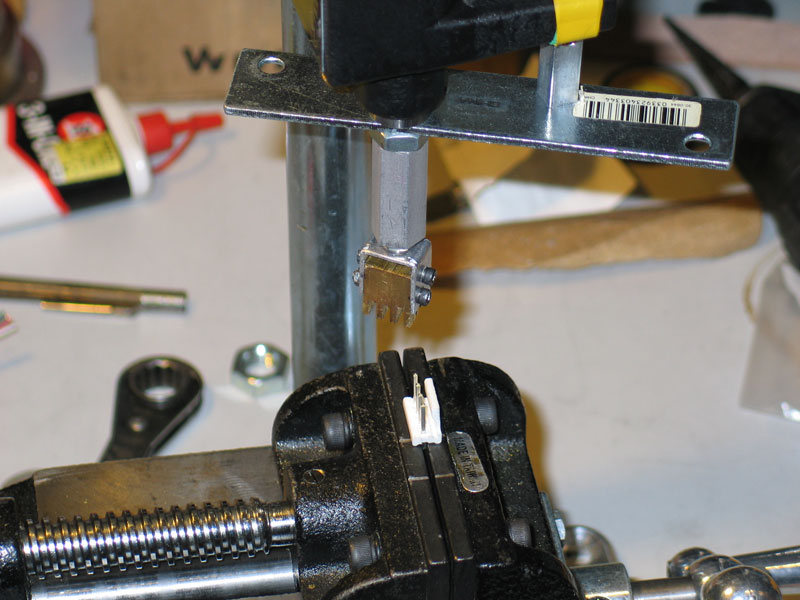
There were some other experiments during this process that I'll cover at a later date - like using a Dremel tool in the drill press as a mill (terrifying experience!), how to adapt the Dremel drill press to work as an actual press, and how to just modify the Dremel drill press so it's not such a piece of shit - but I've GOT to get back to work.
Tomorrow I hope to finish this series with the adaptation of a basic ribbon-cable IDC hand press.
posted by flight
at
7:34 AM
0 Comments
Links to this post
![]()
![]()